How to convert an image file to a Geotiff

How do I rectify an image file and convert it to a Geotiff?


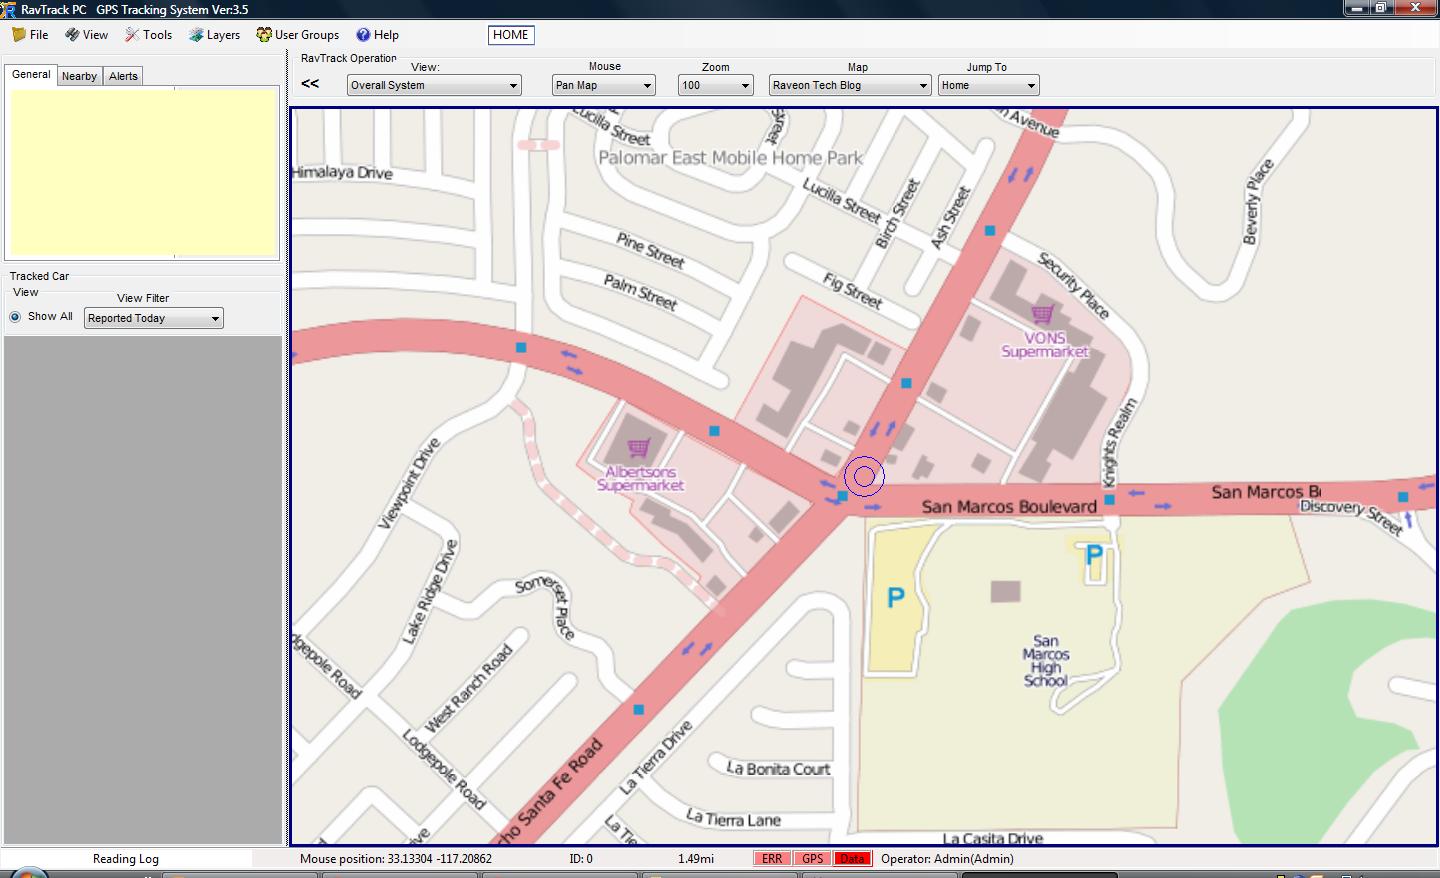
Raveon’s customers have a wide variety of applications for our GPS tracking system. Whether you run a golf course consisting of a few dozen vehicles, or a large fleet that spans an entire city, you may find that you require a specific image for use with the RavTrack Software. The following is an example of how to rectify an image. Rectifying an image translates into the process of converting a standard image into a usable map coordinate system. The map coordinate system will output in the form of a Geotiff file that can be loaded into RavTrack. Our example will be of a simple map image of Vista, Ca. We will use Global Mapper 12 to rectify the image.


1. First start Global Mapper 12 and select download free maps. Select an aerial map or street map, depending on the image you are trying to convert. Download only the area that you are trying to cover. This will be your reference map coordinate system.

2.  Now select rectify imagery under the file tab.


3. Set the configuration with Export and Geotiff selected as shown in the following image. Then select OK.


4. Determine the location of your map image and open it.


5. The image rectifier will open. We will began the process of selecting ground control points on our reference aerial map, and matching the point on our image. This will allow the image rectifier to know the geophysical location of the points on our map. With at least three of these points, the image rectifier will be able to convert the image to a usable Geotiff file for us to use with RavTrack.


6.  Set the projection by selecting the option in the bottom right of the screen. Configure the projection to match your reference coordinate system. Then select OK. For our example we are using UTM zone 11.


7. Find an area on your map image that you can locate as well on your reference coordinate system. Set a ground control point on the reference coordinate system by clicking on the location. Find the exact location on your map image and set the equivalent ground control point.

It is important to ensure that the locations match. You may have to zoom in or out in order to achieve the best match.

Once done, select add point to list. Do this for three different locations that are spaced far away from each other. For example, a control point in the upper left hand side of the image, the upper right hand side, and the center of the map.


8.  Once you have at least three ground control points, select OK. Your image will be converted to a map coordinate system and stored in the same directory from which your map image was retrieved.


For more information on how to use Geotiff files with RavTrack PC, or for more information on UTM zones, please refer to our Tech Blogs in the Map and Imagery Section.

Convert Map Data Files to a RavTrack PC Map File

How can I convert this high precision map that I used with my previous tracking software, the map info is stored in .dat format?

We can easily convert over data files that have stored map information. We will use Global Mapper 12 to load the files into our editable area, set our projection, and then export as a usable Geotiff. We will then convert that Geotiff into .Maplib Format.

The following steps outline the procedure:

1. Start Global Mapper 12 and select (Open all files in a Data Tree).

For our example, we have have a set of data files stored in a local directory. Select (open all files in a directory tree) and choose the directory your files are stored in.

2. Set Options for your .Dat File

The ASCII options window will show for each data file that loads. For our example, we will leave the default values and select OK. Repeat this for each Data File that loads. Note, depending on the data file and stored vector data, not all data may successfully transfer over. You may see a window that asks "Cancel all remaining data file loads", select no and continue loading your files.

3. Map is Now Loaded Into Global Mapper.

The data files have successfully loaded. We can now edit and export the map image.

4.Set Projection

We must now set the correct projection. Select (Configure) under the Tools menu. Then Select the (Projection Tab). Set the projection and zone your map covers. For our example we are using UTM, ZONE 50. There are many reference maps that can be found online with outlined UTM zones. It is very important that you select the correct projection and zone in order the the exported map image to be usable with RavTrack PC. Select OK when finished.

5. Export Geotiff

Select (Export elevation grid format) under the file menu. In the following windows select Geotiff as your export format. We will now export the map file.

6. Select Output Options

The export options window will allow us to adjust the output settings. Our focus is on the sample spacing/scale option, and the world file option highlighted in the above screen shot. The scaling option will allow you to adjust the output resolution of your image. Increase the values for smaller resolution maps, and decrease these values for larger resolution maps. Select the generate world file option and click OK. Save to a known directory that you can easily find again.

7.

Open RavTrack PC. Click (Map Creation Tool) under the tools menu. We will now take our Geotiff and convert it to .MapLib. Select (New Map).

8. Select your .tif Image

Find the directory in which you saved your Geotiff. Select and open you .tif image.

9. New Map Settings

Leave the new map settings defaulted and select OK.

10. Set Projection Settings

Set the Country, Grid, and Zone that the map covers. Note, these parameters must match the settings you placed when creating the Geotiff. Select Next when complete.

11.Save Your MapLib

Your Geotiff has now been converted. Select (Save Maplib as) under the file menu. Save your completed map into your RavTrack PC map directory. This directory location can be found by selecting Help>About RavTrack under RavTrack PCs help menu. After the Save is complete, exit the map creation software.

12. Select Your New Map

Your Map is now ready to be used with RavTrack PC. Select (Program Properties) under the file menu in RavTrack PC. Your map should be located in the lower left hand area of the window. Select your Map and click Save and Exit.

13.Success!

The conversion is complete. Select (Go to Map) under the view menu. Center your map, and your done.

Use Global Mapper 12 to Create a RavTrack Map

The purpose of this tech blog entry is to guide a RavTrack PC user in acquiring a usable Geotiff Map File from Global Mapper 12. This Geotiff can be converted to .Maplib format and displayed on RavTrack PC.  Please note that earlier versions of Global Mapper, including version 10.02 and 11.00, can be utilized for the same operation, however, some specific  WMS data sources are not built in.

Global Mapper 12 is a powerful mapping software that allows access to high resolution geospatial imagery which can be downloaded, edited, and extracted. We are going to focus on the downloading and extracting aspect of the software.  Most RavTrack users have applications that require the use of street, satellite (Aerial), topographic, and similar maps. Obtaining these maps can become somewhat difficult; however, with software packages such as Global Mapper, you can easily obtain a usable Geotiff that can be displayed on RavTrack PC.

To accomplish this please follow these steps:

1. Start up Global Mapper 12.

Ensure you have the registered version. The trial version may limit your ability to extract the geotiff map image.

2. Select (Download free maps/imagery)

Select the type of map you wish to use. Common maps include openstreetmap.org and NAIP Color Imagery. Enter the area location details in the (Select download area) section. The amount of area selected is proportional to download time, larger areas will take longer to process and download.

3. Configure Projection

After your map image has loaded on the screen, select (Configure) under the tools menu.

4. Set the Projection Parameters.

Select (UTM) and the (Zone) for your map’s area. There are many reference maps online which outline the UTM Zones. For our example we are using UTM projection in Zone 11. After you have selected UTM and your Zone, click (OK). Your map is now in the correct projection.

5. Select (Export Raster/Image Format) in the file menu.

Your Map is now ready to export. Ensure you have selected the area you wish to cover.

6. Select Geotiff as your export format.

7. Set Export Options

This is where you can adjust the map image you are exporting. For our example we are going to focus on the (Sample Spacing/Scale) and (World File) option. The scaling option allows you to control you resolution. If you wish to have a high resolution map (More Detail and lower elevation) decrease these values, for lower resolution and a smaller map file, increase these values. Ensure you select (Create TFW (World File)). Once this is done, click OK.

8. Start RavTrack PC and select Map Creation Tool

After the Geotiff export is complete, open RavTrack PC. Select (Map Creation Tool) in the tools menu. We will now begin to convert the Geotiff to a usable RavTrack Image (.MapLib format).

9. Select New Map

This is the map creation software that will convert the geotiff to .maplib.

10. Select the Geotiff Image

Find the directory of the Geotiff image and select the .tif image that exported by Global Mapper. Once selected click OK and the geotiff will be loaded into the map creation tool.

11. Select OK to the Default Settings.

Click OK to the default settings here and select OK.

12. Click Yes to World File

The map creation tool will ask you wif you would like to use the world file you selected in Global Mapper. Click Yes.

13. Select Grid

This section is vital, incorrect values will cause the map image to display incorrect coordinates. Enter your (Region), (Grid), and (Zone). For our example we are located in the United States, using UTM North, and in Zone 11. Once complete, click next.

14.Verify Coordinates

You have completed the conversion process. Click anywhere on the map and the coordinates of that location will display on the lower left hand side. You can verify these coordinates by referencing them with known locations from an alternate source such as Google Earth.

15. Save your Map

Select save MapLib as under the file menu.

16. Locate your RavTrack Map Directory.

Locate your RavTrack PC map directory. You can find the specific location of this folder by selecting ABOUT RAVTRACK under the RavTrack PC help menu. Save your .MapLib.

17. Open Program Properties

Open Program Properties located under the file menu in RavTrack PC. Your Map will be located on the lower right hand side. Select your Map file and click save and exit.

18. Success!

You have successfully converted a Geotiff to .Maplib. If your map does not show on the screen immediately, select VIEW>GO TO MAP. Your map will display and you can now use it with RavTrack PC.

RavTrack PC Map Creation step-by-step

Creating a Map for RavTrack PC


Creating a map to be utilized by RavTrack PC can be completed in just a few steps.  We like to use a powerful mapping program called Global Mapper for development of our maps, however, there are several free programs and websites on the internet that allow you to obtain map images.  For this example, we use a program called Google Map Buddy that was downloaded from CNET.COM.  This blog provides  a short summary of how to obtain a map image, calibrate it with the Ravtrack Software, and then use it with Ravtrack.


                This process will include a quick overview of the program Google Map Buddy.  After which, we will take the image we have obtained and use Ravtrack PC to calibrate the image.  You will need to have Google Earth or a similar program in order to obtain coordinates of your calibration area. 

With Google maps open we begin by opening up Google map buddy:


Enter the exact address of where you want your map centered:


For this example we are centered at the City of Borger Texas:

Select the area that you want the Map to encompass and the zoom level.  Zoom levels go from 1 (low detail) to 19 (high detail) and will increase the file size of your image.   Decide on the level of detail you need and select it from the drop down box.


Click create map and choose a file name:


Google Map Buddy has the option of outputting the image as an aerial satellite view, road (street) map, terrain (Topo) map, or hybrid map.  Select the appropriate option and click OK:


Google Map Buddy will download the image and ask you if you would like to delete the tiles it has downloaded, select yes.


Your image is now created:

The image will be in a PNG file format and will have to now be calibrated to properly represent the latitude and longitude of the points on the map.


Open up Ravtrack PC and select  TOOLS > MAP CREATION TOOL:


Now you will have to open the map PNG image that you created with Google Map Buddy. To do this click MAP > NEW MAP:


The map creation tool will ask you a few questions about the settings. Click OK to the defaults:


Select the images country, Grid, and Datum. The settings illustrated below are correct for the City of Borger .  Click NEXT and proceed:


Select the projection. For smaller images (typically less than 100 miles across) such as the city of Borger, we will use Cartesian. For large land masses, polar would have to be used.  Click NEXT:

Your image will now require the lat/long calibration mentioned earlier.


The tool will ask you to click on a known coordinate (a clear point on the map, such as a road intersection or natural feature).  Before you do this you must be prepared with the precise latitude and longitude of the coordinate you will select:


If you don’t know the lat/long of your coordinate open Google earth and select your location. You will use Google Earth in order to obtain coordinates of 3 points. You will want to choose points towards the periphery of your image. For example, if you have a map of a city, you may select points towards the far upper left, bottom center, and upper right.


Align the map creation tool and Google Earth images side by side, and visually identify an initial coordinate point on each map. This will start the calibration. The calibration consists of finding points on Google earth that correspond to your image’s point on the map. Once you have found that exact map point, copy down the coordinates that are located at the bottom of the Google earth screen.  In the RavTrack PC  screen (the left side screen on the example below) you can now click on the exact location your coordinates correspond to:


The Scaling wizard will come up next. Now you can enter your coordinates. Ensure your coordinates are correct with the proper heading (West, East, North, and south). Click next to finish calibration of this point:

Repeat this step for two more coordinate points and you will receive a scaling complete message. After calibration, save your resulting MAPLIB file to your Ravtrack map directory.  Now you can load your map and use it with Ravtrack!


Here’s a quick list of free programs and websites:

http://download.cnet.com/Google-Map-Buddy/3000-20426_4-10962144.html

http://www.google.com/mapmaker


There are many programs and sites that will give you a map image that can be used for calibration.


Sources of Map Images

The following is a list of some on-line commercial sources of image files that are suitable for use as map images. 

www.unearthedoutdoors.net

UnearthedOutdoors resells image tiles measuring 2° on a side (49,284km² at the equator).  True Marble™ is available for purchase for latitudes between N84° and S60°. The tiles are georeferenced in WGS84 Lat/Lon projection for use in all modern GIS programs. The GeoTIFF format maintains compatibility with popular image processing programs such as Adobe Photoshop™. Mercator projection and tiled JPEG format are also available. Other formats and projections are available on request.
www.unearthedoutdoors.net/global_data/true_marble/purchase.

WMS Global Mosaic GeoTIFF Download

This page contains links for a complete set of the raw image data contained in the WMS Global Mosaic, base resolution only. The files are grayscale geotiffs, with the proper geolocation tag information for integration in GIS. These gzip compressed geotiff files are very large, between 350 and 500 Megabytes each, and will decompress to 800MB tiffs, 28800×28800 pixels, covering 4×4 arc-degrees fo the panchromatic band and 8×8 arc-degrees for the other bands.
www.collections.sdsc.edu/dac2/telascience/telascience_data/onearth

Customizing Your Map

There are many ways to customize the map you use with your RavTrack PC vehicle tracking program.   RavTrack PC uses any bitmap image, scanned map,  jpeg photo, or geotiff file as the base-map to display vehicle location.  Simply load your image/map into the calibration tool (mapmanger), and then calibrate 3 points with known latitude and longitude and the map is ready to use.  Note: .geotiff files are already have their calibration embedded into them so they do not need to be calibrated for use with RavTrack PC.

Your customization options are:

  1. Add custom icons to the map file
  2. Importing Points of Interest (POIs) and identifying them on the map.
  3. Import and overlaying ESRI shape files.
  4. Manually place Points of Interest (POIs) on the map and label them.
  5. Draw colored line, poly-shapes, ovals, circles, rectangles, and squares on the map.

Once the map is calibrated, you can import custom icons right into the emap file.

1. Adding Custom Icons on the map

All icons in RavTrack PC are actually small .jpg of .bmp files which are loaded into the .maplib file and given a name.  By naming the icon, you are able to assign it to tracked vehicles/objects or simply place it on the map as a POI.  As a POI, you are able to create alert rules to notify the operator when vehicle get too close or too far away from the POI.

To import a custom icon made as a  .jpg of .bmp file, first open the map file you would like the icons to be associated with.  Note, RavTrack PC comes with a rich set of default icons stored in the standardicons.maplib file, but you may load your own custom icons into any .maplib map file or load them into the standardicons.maplib file and have them available to all maps.

To open and edit the .maplib file, select Tools > Map Creation Tool from the RavTrack PC main screen.  This will open the GpsToolsStudio from Franson, which is the tool used to calibrate maps and load icons.  Load the .maplib file you wish to insert you custom icons into, and the choose Icons > New Icon to import the icon craphic into the map.  Don’t forget to save your .maplib file once the icon is imported and named.

2. Importing Points of Interest (POIs) and identifying them on the map.

RavTrack PC is an exceptional vehicle tracking software program.   It excels at locating tracked vehicles, alerting the operator of special conditions, and presenting a complex AVL system in a very user-friendly manor.  But, it is not as powerful as some other program are in the area of GIS, route planning, and map manipulation.  The good news is, that most progams can export in various standard file formats, and RavTrack can import data in a number of different format.  This allows you to do complex mapping and planning using any number of mapping tools, and then import your waypoints and tracks into RavTrack PC.

A common task is to plan an event such as a road-rally, marathon, or race.  Ozi Explorer and Global Mapper are just a couple very powerful programs that a user can create routes and place waypoints on their maps.  Once your plan is complete, save the waypoints in either an Ozi .wpt waypoint file, or in Garmin’s .gpx file format.  From RavTrack PC, select File > Import Tracks, Plots, Waypoints from the main screen.  When using the .gps file format, you must choose the “Import as POI” option to put the waypoints onto the map’s POI layer.

3. Import and overlaying ESRI shape files.

RavTrack PC can import some ESRI shape files and overlay them on the map image.  Certain large files do not import but most ESRI shape files less than a few MB seem to load and display properly.  From RavTrack PC, select File > ESRI FIles… from the main screen.  Select your ESRI shape file to import it onto the map.

The default settings for the ESRI shape import files is configured with the File > Program Properties > ESRI Data.

4. Manually place Points of Interest (POIs) on the map and label them.

You may place any icon at any location on the map as a Point of Interest.  To do so, select File > Drawing Tools.  This will bring up the drawing toolkit.

drawingtool

Select “Point of Interest” as the type of object to draw.  Then select the name of the icon you wish to place on the map.  Once selected, click on the location on the map that you would like the POI placed.  Once you click on the map, a box will pop-up so you can assign the POI a name such as “Joes House”.  Once you have placed all the POIs on the map, they may then be used in the Alert Rules you create.

You may also turn the POI layer of the map on or off.  On the top of the main RavTrack PC main screen is a drop-down box, where you can select which layers are visible on the map.

View DropDown
View DropDown

5. Draw colored line, poly-shapes, ovals, circles, rectangles, and squares on the map.

Using the Drawing Toolkit, you may place graphics on your map at any location.  To do so, select File > Drawing Tools.  This will bring up the drawing toolkit.  Select the Map Graphics layer, select your shape and the color of the shape, and then draw it on the map.  When drawing polygons, press the enter key when done drawing.

Creating and Adding Maps to RavTrack PC

Creating and Finding Map Images

All GPS Tracking software programs need some source of image files to overlay the position of the things being tracked.  The Internet provides a rich source of map images, and this page identifies some of the better sources.  If you find others, please let us know about them. 

RavTrack PC GPS Tracking Software by Raveon uses uses map files stored in the “.maplib” format.  This format was developed by Franson for display geo-referenced map images.   Virtually any type of image may be converted to a “.maplib” file, using the built-in calibration tool within RavTrack PC.   Images or maps that are in the  .jpg, .tiff, .bmp, and .gif file format may be converted.  Aditionally, any file in the “.geotiff” file format may be inported as a .maplib file, and the calibration in the .geotiff file will be used.

Below are some links to websites that provide map imagery for GPS tracking use. 

Topographic Maps in .geotiff format

Low-cost topo  maps, pre-calibrated in .geotiff format.  

Map Image Service

Digital Data Services Inc. provides custom map service.  Contact them if you would like them to create a custom map image for your location.  Remember to ask for the file in .geotiff format, so that you do not have to calibrate it when using it with RavTrack PC.